I’ve been estimating and supervising industrial flooring projects for twelve years now. In that time, I’ve seen some beautiful handover ceremonies where the resin looked like glass, only for the floor to start peeling, cracking, or turning into a slip hazard three months later. Why? Because the client focused on the price of the topcoat and ignored the state of the concrete underneath.
If you take one thing away from this article, let it be this: Flooring is infrastructure, not decor. When I walk into a facility, I don’t care how shiny it looks on day one. I care about what that floor sees on a wet Monday morning in November when a forklift is dragging a pallet of chemicals across it. If you treat your flooring budget as a "finish" expense rather than a structural investment, you’ve already lost.
The Four Decision Factors
Before you even look at a colour chart, you need to define what the floor actually does. If you can’t answer these four questions, you shouldn’t be spending a penny on resin.
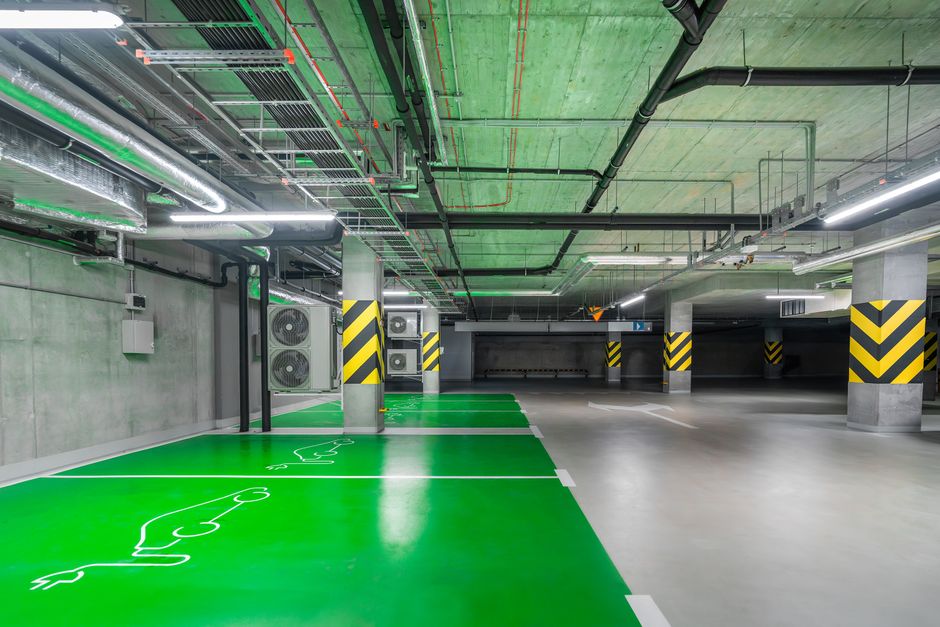
- Load: Are we talking about foot traffic, pallet trucks, or 5-tonne forklifts with high point-loading on the wheels? Static load is a breeze; dynamic load (turning and braking) is what rips a poor system right off the slab. Wear (Abrasion): What is the frequency of traffic? Is it constant 24/7 warehouse movement, or is it a light-duty packaging room? Chemicals: Do you have acids? Solvents? Blood? Fats? Every chemical has a different pH and reaction time. If you use a standard epoxy where you need a polyurethane cement, you're just throwing money in the bin. Slip Resistance: Please, for the love of all things holy, stop asking for "an R-rating" and then talking about how it feels when it’s dry. We test for slip resistance using the Pendulum Test Value (PTV). If you are in a food production environment, the floor will be wet. If you only look at dry slip resistance, you’re setting yourself up for an HSE investigation.
Substrate Prep: The "Hidden" Cost That Should Be First
I see it every week: a client gets a quote, signs it, and then the contractor turns up, looks at the floor, and says, "Oh, we need to do extensive diamond grinding and crack repairs—that’ll be an extra £5,000."
This is my biggest annoyance in the industry. It’s either a lack of due diligence by the estimator or a predatory "variation" tactic. Budgeting for shot-blast and grind isn't an elective; it’s the foundation of your floor's life. If the surface isn't profiled to a CSP (Concrete Surface Profile) that allows the resin to mechanically interlock, no primer in the world will save you.
Shot-blasting vs. Grinding: When to use what?
You can’t just decide on the day. You need to know the state of your slab:
- Shot-blasting: This is my go-to for removing heavy contamination, laitence, and providing a deep profile for heavy-duty systems. It creates the "tooth" required for high-build screeds. Grinding: Essential for edge work and smoothing out local high spots. However, if you rely on grinding alone for a large area, you aren't getting the profile needed for a long-term industrial bond.
I’ve seen firms like evoresinflooring.co.uk who insist on proper surface preparation protocols before they ever mix a drum of resin. They know that a failure to remove a weak surface layer (laitence) will lead to delamination, regardless of the quality of the product being laid.
DPM and Levelling: Stop Skipping the Moisture Test
Nothing grinds my gears more than skipping moisture tests. If you have a high moisture vapour transmission rate in your slab and you don't install a DPM (Damp Proof Membrane), that moisture will come up, hit your impermeable resin layer, and create osmotic blisters. Those blisters are basically bubbles of regret.
When budgeting, always factor in:
Moisture testing: Use a hygrometer. If it’s above 75% RH (Relative Humidity), you need a DPM. Levelling: Don't expect the resin to "level itself" over a damaged or uneven slab. High-performance levelling compounds are expensive, but they ensure your structural load is evenly distributed. Crack repairs: Rigid resin on a moving crack equals a cracked floor. You must use epoxy resins to "stitch" the crack before you even think about applying the coating.If you're looking for specialists who understand the importance of structural substrate prep, teams like kentplasterers.co.uk often handle the preparatory groundwork required to bring an old slab back to a standard suitable for high-performance resin application.
System Pros and Limitations: A Quick Reference
Use this table to align your expectations with the technology available. Note that "Heavy Duty" means nothing without the thickness specification.
System Thickness Best For Limitation Epoxy Coating 200-400 microns Light duty, dust proofing Poor impact/heavy load resistance Self-Smoothing Epoxy 2mm - 3mm Cleanrooms, dry warehouses Can scratch; not for wet or thermal shock Polyurethane Cement 6mm - 9mm Food production, cold stores Ugly, harder to clean, industrial look MMA (Methyl Methacrylate) 2mm - 4mm Fast turnaround requirements High smell, high cost, highly technicalUK Compliance: BS 8204 is Your Bible
You high traffic warehouse flooring options cannot talk about flooring in the UK without referencing BS 8204. It dictates the standard for the installation of insitu flooring. If you are hiring an estimator who doesn't reference this, show them the door.
Compliance isn't just about ticking boxes for the insurers; it’s about liability. If someone slips on your floor because you cheaped out on the anti-slip aggregate (or worse, didn't account for the slip resistance when wet), you are liable under the Health and Safety at Work Act. The PTV test is the industry standard—insist that your contractor provides a PTV report post-installation. If they tell you the floor is "R-rated," ask them what the PTV is in wet conditions.
How to Write Your Budget Estimate
To stop the "variation" game from ruining your fiscal year, request your quote in a breakdown format. Never accept a "sum" for prep. Ask for:
- Mobilisation: Logistics and setup. Mechanical Prep: A defined cost for shot-blast and grind per square metre. Repairs: A budget allocation for "crack repairs" based on a linear metre survey. DPM/Priming: A separate line item for moisture mitigation. System Installation: The resin material and labour.
If they refuse to break it down, assume they are hiding costs. A professional contractor, like those found at evoresinflooring.co.uk, will be transparent because they want you to understand exactly what you are paying for—and why it’s necessary for the floor to last a decade.
Final Thoughts
Ask yourself this: i’ve spent twelve years fixing floors that didn't need to fail. It always comes down to the same thing: someone tried to cut corners on the substrate. The substrate is the floor. The resin is just the skin.
If you’re building a warehouse or a food plant, don't ask yourself, "What does it look like on handover day?" Ask yourself, "What does the floor see on a wet Monday morning?" Once you know that, the budget for your prep will suddenly seem like the best money you ever spent.
Plan for the worst, prep for the best, and always, always test your moisture levels.